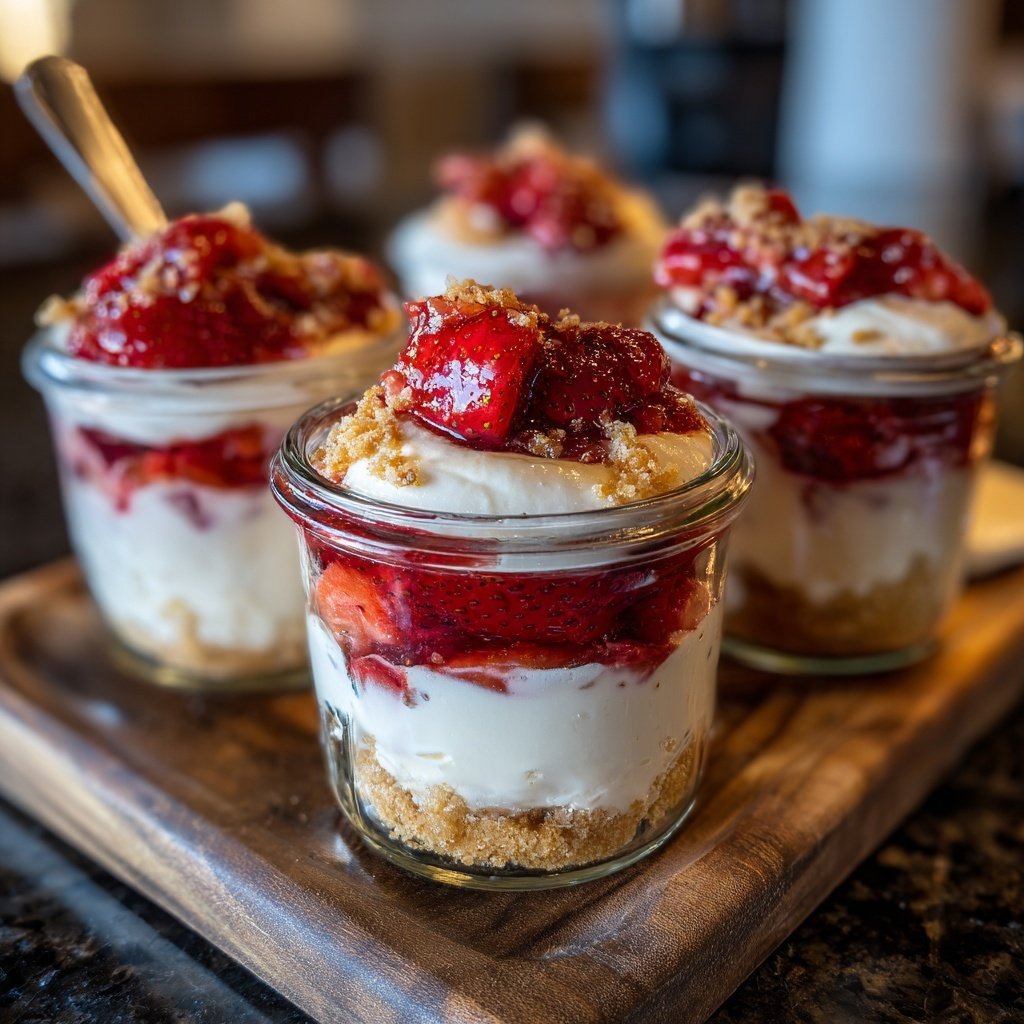
No Bake Strawberry Cheesecake Jars
Highlighted under: Golden Oven Sweets
I love making No Bake Strawberry Cheesecake Jars, especially on warm days when I want something refreshing yet indulgent. The best part is that I can whip them up in under 30 minutes, and they require no baking at all! Each layer is creamy, sweet, and infused with the delightful taste of fresh strawberries. Plus, they’re perfect for serving to guests since they look beautiful in mason jars. It’s a crowd-pleaser that never fails to impress!
When I first made No Bake Strawberry Cheesecake Jars, I was amazed at how easy and delicious they were. I used a simple mix of cream cheese and whipped topping, which gave the cheesecake a light and airy texture.
To enhance the flavor, I added a touch of lemon juice and zest, which brightened the sweetness of the strawberries. This combination really elevates the dish, making it a must-try for anyone who loves cheesecake!
Why You'll Love This Recipe
- Luscious creaminess paired with fresh strawberries
- No baking required, making it a quick dessert
- Beautifully presented in individual jars
Choosing the Best Strawberries
When making No Bake Strawberry Cheesecake Jars, the quality of your strawberries will significantly impact the overall flavor. Look for berries that are vibrant red, firm, and slightly fragrant. Avoid those that appear dull or have greenish tops, as they are often under ripe. If fresh strawberries aren't in season, you can substitute with frozen strawberries; just ensure to thaw and drain them thoroughly to remove excess moisture before using them.
Macerating the strawberries is a key step in developing their flavor. The process not only enhances sweetness but also softens the berries, making them a delectable topping for your cheesecake layer. Letting them sit for about 10 minutes should be sufficient, but you can allow them to sit even longer if you prefer a more syrupy consistency.
Importance of Cream Cheese Temperature
Using softened cream cheese is crucial for achieving a smooth and creamy cheesecake layer. Out-of-the-fridge cream cheese can lead to a lumpy texture, which could ruin your jars' aesthetic. To soften cream cheese quickly, cut it into small cubes and let it sit at room temperature for about 15-20 minutes. Alternatively, you can microwave it for about 10-15 seconds, checking to ensure it doesn't melt.
Combining the cream cheese with powdered sugar and other ingredients should be done gradually. Start mixing at a low speed to prevent the sugar from flying out of the bowl. Once combined, you can increase to medium speed until the mixture is glossy and smooth, which usually takes about 2-3 minutes. This technique helps incorporate air, making the texture lighter.
Creative Serving Suggestions
Serving these cheesecake jars is not just about the taste; presentation matters too! You can enhance your jars with a sprig of mint or a dollop of whipped cream on top for an elegant touch. If you're feeling adventurous, consider drizzling a thin line of melted chocolate or caramel sauce over the top before serving.
These jars can be made in advance, making them an ideal option for parties or gatherings. They can stay fresh in the refrigerator for up to 3 days, so you can prepare them ahead of time without losing flavor. Just keep the jars tightly sealed to maintain freshness and prevent the crust from becoming soggy.
Ingredients
Gather these ingredients to get started:
For the Cheesecake Layer
- 8 oz cream cheese, softened
- 1 cup whipped topping
- 1/2 cup powdered sugar
- 1 teaspoon vanilla extract
- 1 tablespoon lemon juice
- 1 teaspoon lemon zest
For the Strawberry Layer
- 2 cups fresh strawberries, sliced
- 2 tablespoons sugar
- 1 tablespoon lemon juice
For the Crust Layer
- 1 cup graham cracker crumbs
- 4 tablespoons melted butter
- 2 tablespoons sugar
Mix and match the layers as desired!
Instructions
Follow these steps to assemble your cheesecake jars:
Prepare the Crust
In a bowl, combine the graham cracker crumbs, melted butter, and sugar. Mix well until the crumbs are evenly coated. Spoon the mixture evenly into the bottom of four mason jars, pressing down gently to form a crust layer.
Make the Cheesecake Filling
In a mixing bowl, beat the softened cream cheese until smooth. Add the powdered sugar, vanilla extract, lemon juice, and lemon zest. Mix until fully combined and creamy. Gently fold in the whipped topping until there's no visible streaks.
Prepare the Strawberries
In a separate bowl, combine sliced strawberries, sugar, and lemon juice. Let them sit for about 10 minutes to macerate and release their juices.
Assemble the Jars
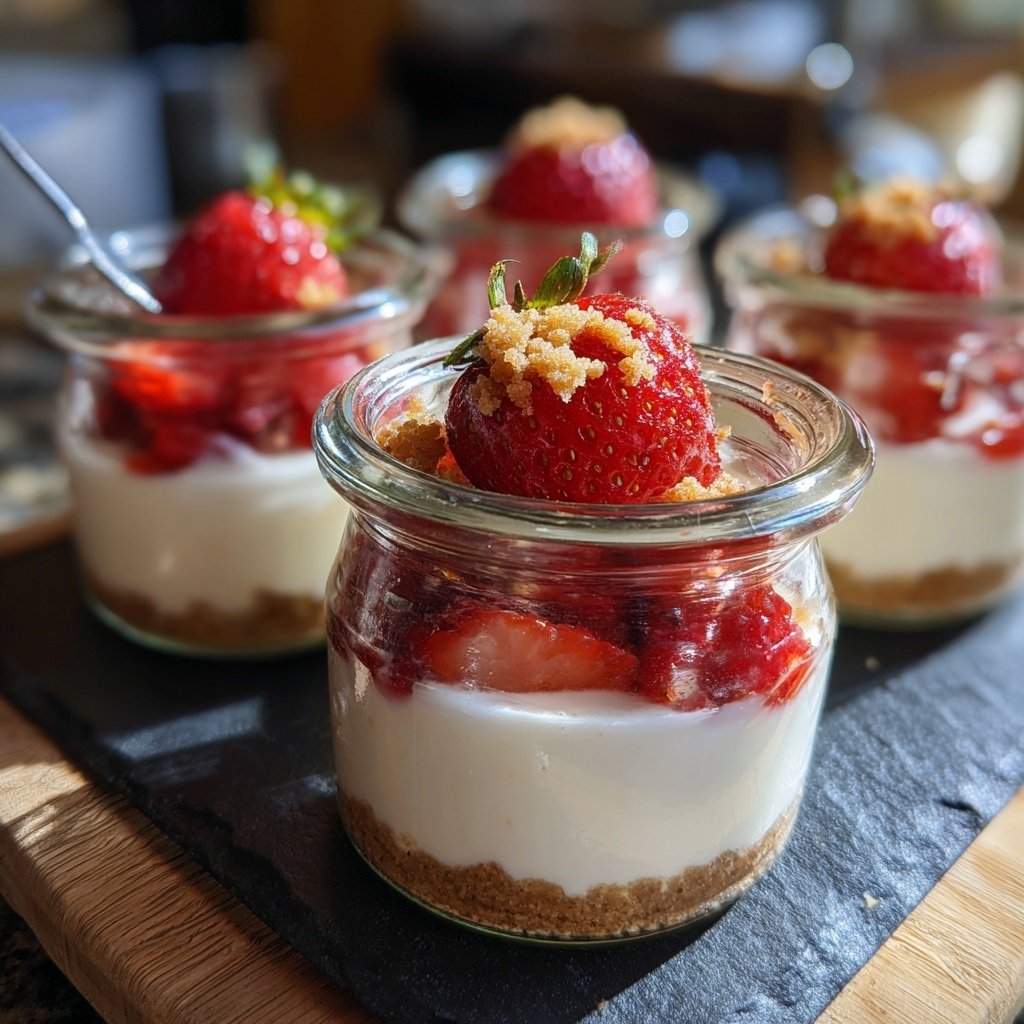
Layer the cheesecake filling on top of the crust in each mason jar, followed by a layer of the macerated strawberries. Repeat the layers until jars are filled, finishing with a strawberry layer on top.
Chill and Serve
Refrigerate the jars for at least 2 hours before serving. Enjoy your delicious No Bake Strawberry Cheesecake Jars!
Serve chilled and savor the delightful flavors!
Pro Tips
- To make it even more special, garnish with whipped cream and a fresh strawberry on top before serving.
Storing Leftovers
If you find yourself with leftover No Bake Strawberry Cheesecake Jars, store them in the refrigerator in an airtight container. They are best consumed within 3 days, but the whipped topping may lose some of its fluffiness after the first day. To keep the crust crisp, it's advisable to layer it just before serving.
If you plan to store any leftover ingredients, such as the cheesecake filling or strawberries, separate them to preserve their individual textures. The filling can last about a week in the fridge, while the sliced strawberries should be eaten within 2-3 days to enjoy their freshness.
Variations to Try
While this recipe highlights the classic strawberry flavor, you can easily switch up the fruit to customize the cheesecake jars. Blueberries, raspberries, or even a mixed berry topping can create delightful variations. Just be mindful of the sugar adjustment depending on the tartness of the fruit you choose.
Feel free to experiment with different flavored extracts in your cheesecake layer. Almond or even coconut extracts can provide a unique twist to the creamy base, making it all the more delightful. Just remember to start with a small amount and taste test as you mix to avoid overwhelming the flavors with too much extra sweetness.
Questions About Recipes
→ Can I use frozen strawberries instead of fresh?
Yes, you can use frozen strawberries, but make sure to thaw and drain them before using to avoid excess liquid.
→ How long can I store these jars in the fridge?
They can be stored in the fridge for up to 3 days, but they are best enjoyed within 1-2 days for optimal freshness.
→ Can I substitute the cream cheese for something lighter?
You can use Greek yogurt as a lighter alternative, although the texture will be slightly different.
→ Is there a gluten-free option for the crust?
Absolutely! You can use gluten-free graham crackers or even crushed nuts for a gluten-free crust.
No Bake Strawberry Cheesecake Jars
Created by: Megan Douglas
Recipe Type: Golden Oven Sweets
Skill Level: Easy
Final Quantity: 4 servings
What You'll Need
For the Cheesecake Layer
- 8 oz cream cheese, softened
- 1 cup whipped topping
- 1/2 cup powdered sugar
- 1 teaspoon vanilla extract
- 1 tablespoon lemon juice
- 1 teaspoon lemon zest
For the Strawberry Layer
- 2 cups fresh strawberries, sliced
- 2 tablespoons sugar
- 1 tablespoon lemon juice
For the Crust Layer
- 1 cup graham cracker crumbs
- 4 tablespoons melted butter
- 2 tablespoons sugar
How-To Steps
In a bowl, combine the graham cracker crumbs, melted butter, and sugar. Mix well until the crumbs are evenly coated. Spoon the mixture evenly into the bottom of four mason jars, pressing down gently to form a crust layer.
In a mixing bowl, beat the softened cream cheese until smooth. Add the powdered sugar, vanilla extract, lemon juice, and lemon zest. Mix until fully combined and creamy. Gently fold in the whipped topping until there's no visible streaks.
In a separate bowl, combine sliced strawberries, sugar, and lemon juice. Let them sit for about 10 minutes to macerate and release their juices.
Layer the cheesecake filling on top of the crust in each mason jar, followed by a layer of the macerated strawberries. Repeat the layers until jars are filled, finishing with a strawberry layer on top.
Refrigerate the jars for at least 2 hours before serving. Enjoy your delicious No Bake Strawberry Cheesecake Jars!
Extra Tips
- To make it even more special, garnish with whipped cream and a fresh strawberry on top before serving.
Nutritional Breakdown (Per Serving)
- Calories: 320 kcal
- Total Fat: 22g
- Saturated Fat: 10g
- Cholesterol: 50mg
- Sodium: 190mg
- Total Carbohydrates: 28g
- Dietary Fiber: 1g
- Sugars: 18g
- Protein: 4g